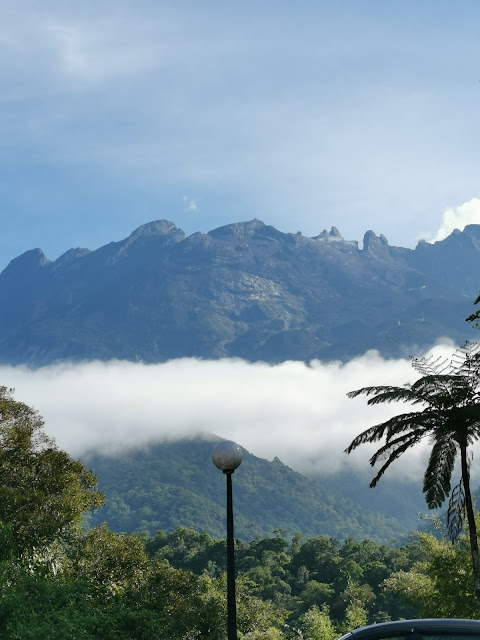
Climbing Mount Kinabalu has always been in my bucket
list ever since I got posted to Sabah two years ago. It was a personal
achievement and a notable highlight of the year while going through life in
Borneo in the middle of a pandemic. And it definitely makes a perfect anecdote
about my life in the East Malaysia!

This was probably the craziest thing I’d ever done
this year because our Mount Kinabalu trip was pretty much an impromptu
challenge! If you have known me on a personal level, I absolutely need to plan
things ahead, and sort out the details prior to carrying out something. We booked
a month earlier before the climb and we had around 3 weeks to train and prep!

What you need to know before climbing Mount Kinabalu?
- Mount Kinabalu is the tallest mountain in Malaysia and the highest accessible peak is the Low’s Peak (4095m).
- Climbers are required to stay ONE night at Panalaban Base Camp (2D 1N climb). One Day Mount Kinabalu Climb permits are currently NOT Available. It’s temporarily suspended due to safety issues. (as of Dec 2020)
- There are two summit trails - Ranau Trail(standard) and Kota Belud Trail (path less taken). (from Panalaban area to the Summit). Read more here
- Climbers can opt to choose the standard summit climb or Via Ferrata.
- Due to the Covid-19 pandemic, only 120 climbing permits issued daily by Sabah Parks as of 16 September 2021.
- All climbers are required to engage a mountain guide.
- No age
limit for climbers! As long as you’re in good health status
and fitness level or you have doctor’s approval if you are on any medication.
- Best month
to climb: February, March, April
Standard Climb vs Via Ferrata
Via Ferrata is a protected mountain pathway consisting
of rungs, rails, cables, bridges that are installed on the rock face. The only
difference from the standard climb is that Via Ferrata has a different and more
scenic, yet challenging pathway when descending from the summit to Panalaban on
Day 2.
Via Ferrata is definitely not for the faint hearted
with a fear of heights, as Via Ferrata Mount Kinabalu is certified to be the
highest in the world! But if you’re up for a more challenging Mount K
experience, you should definitely go for it. Because Via Ferrata allows you to
enjoy the scenic view that are inaccessible via the normal descent route.
There are 2 types of Via Ferrata routes – Walk the
Torq & Low’s Peak Circuit. Walk the Torq is designed for
beginners, with the routes takes 2-3 hours to complete, while Low’s Peak
Circuit is more on an intermediate level which takes 4-5 hours to complete.
Read more info here on Via Ferrata routes here to help you to decide which Mount K experience you’d
like to have!

Track Route
For the standard climb, this is the trail route for
the usual 2D1N climb packages. You may opt for the 3D2N climb package which
includes an extra day at Kinabalu Park prior to the climb. Alternatively, you
may plan on your own to stay a day earlier in Kinabalu Park or Kundasang area
to acclimatize with the altitude before your climb.
Day 2: Panalaban-Summit Ascent to Low’s Peak-Laban Rata- Descend Mount Kinabalu-Timpohon Gate
For Via Ferrata, you’ll be experiencing a different route from the summit to Panalaban, before descending.
Accommodation Options
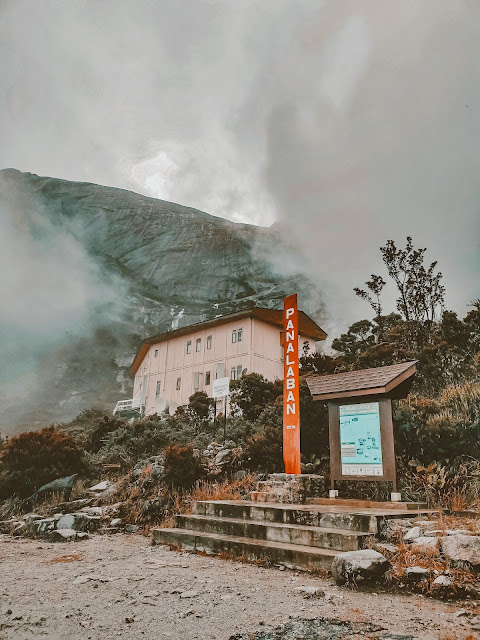
At Km 6, you’ll reach Panalaban Base Camp at an
elevation of 3,272 m where you’ll rest, freshen up, and spend the night before
continuing your journey to the summit.
 |
| you can post postcards from the highest post box |

Preparation
Booking
You may book it through a tour agent or simply book it
yourself via website or email. We booked it directly with the management
ourselves to save us from unnecessary agent fees. But if you do not want to go
through the hassle of multiple bookings, going through a travel agent would be
a better choice.
If you’re booking it yourself without going through
tour packages offered by tour agents, you may begin with accommodation booking.
Accommodation booking is performed directly with the respective operators. Accommodation
packages usually include food as well.
For lodgings managed by Sabah Parks, you may book
directly via their website:
booking.sabahparks.org.my.
As for Laban Rata Rest House, you may book through
Sutera Sanctuary Lodges via website, email, or walk-in their administrative
office in Sutera Avenue. Likewise, Via
Ferrata can be booked via Mountain Torq.
Breakdown of Cost
How Much Does It Cost to Climb Mount Kinabalu?
Now that we have done the accommodation booking, let’s
see what was next.
Kinabalu park Entrance Fee: RM3Climbing Permit: RM50Climbing Insurance: RM7Mountain Guide: RM230 (for 4 of us)Transport from Kinabalu Park to Timpohon Gate: RM17/way (for 4 people)Climbing Certificate: RM 10.60Porter:RM13/kg (from Timpohon-Laban Rata) one way
(*Cost calculated for a Malaysian adult. For more information on the rates, kindly refer to the picture below)
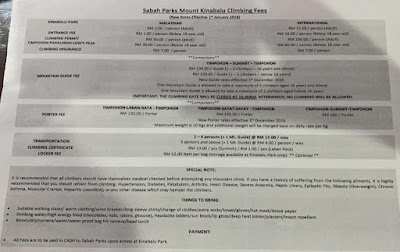
All these fees need to be paid by cash in Sabah Parks on the day of the climb. Alternatively, you can opt not to hire a porter to carry your belongings because why not?
Our total estimated basic cost including accommodation and food was around RM700. Prices may be varying as there was a promotion when we purchased it. Be sure to check out their latest promo on social media pages so you’ll get the best deal.
Basic Packing List
Once you have settled your accommodation booking and know
your estimated expenses for your climb, it’s time to start packing!
For starters, create a packing list tailored to your
personal needs. You may refer to the essential packing list here as your reference.
This was my personal packing list which was proven
fundamental throughout my hike.
Big waterproof bag (for the porter)Small hiking bag (hand carry)Trekking poleRain coat/ponchoHiking shoes with good grip2 fast-drying shirts2 pairs of track pants2 pairs of socks (bring extra!)Windbreaker/ waterproof jacketFleece JacketUniqlo Heat tech TopUniqlo Heat tech leggingsHeating Pads (optional for those who can stand the cold)BeanieGloves with good grip, better still waterproofSunglassesHead torch & extra batteriesKnee guard (optional for stronk knees)Towel, small towelToiletries- sunblock, toothbrush, toothpaste, wet wipes, insect repellentFood- drinking water, isotonic drinks, chocolate bars/energy bars, medicationsIC, some cash

Equipment
If you’re an avid hiker, you probably own all the
hiking gears and ready to climb any moment. If you made a vow to only climb
Mount K and never climb any mountains after that, I suggest you to borrow
hiking equipment from friends if possible, or you may purchase them and sell it
later.
I purchased most of the items especially clothing. I’ll
be sharing briefly on where I got the stuffs from at most reasonable prices in
Kota Kinabalu.
Sports
Direct Oceanus- this is basically heaven for outdoor and sports
junkie in KK. You can basically find most of
the hiking or outdoor gear here such as trekking pole, clothing, gloves, backpacks,
and many more. I got my running shirts and trekking pants here as well as my
trekking pole. They do have sales promotions from time to time and sometimes
you can get a really good bargain out of it. Alternatively, you can try
checking out Tong’s Traveler Gear at Suria Sabah for windbreaker,
backpacks although their products are a little shabby for me. You may also
check out Decathlon for their affordable equipment as well as
clothing and shoes, however I am a little skeptical with online shopping for
outdoor gears, something I am not very familiar with (because there’s no
physical store here in Sabah). Or if you don’t mind spending a little in
investing on your future hiking adventures, you might as well just go to Montanic
Adventure Store (Suria Sabah)!
Most of my outfits on the second day came from my own winter wear wardrobe. It’s crucial to wear appropriate outfits to keep you warm prior ascending to the summit as the weather can be very cold and windy with temperature as low as -3 Celcius. Uniqlo’s Heat Tech turtleneck top and Ultra warm leggings really did a great job of keeping me warm. Adding an extra layer of fleece jacket from Uniqlo also and top off with a windbreaker, and you’re good to go.
Daiso- got some heating pads or hand warmers, for extra warmth.
Training
Given that we had less than one month to train and prep
our body for the challenge, this is probably not the right place to seek
fitness prep advice from. It’s recommended to start training couple of months
prior to your climb. You may start with cardio training like running, walking,
cycling, swimming to build up stamina and endurance.
 |
| Bukit Padang hiking trail |
I usually do home workouts since MCO begun. I
increased the intensity and frequency of my work outs 3 weeks prior to the
climb. If you’re training in Kota Kinabalu, Bukit Padang is the popular
training spot among locals. That’s simply because its hiking trail is similar
to Mount Kinabalu’s.
Aside from cardio, upper body strength training and
core work out is important too as it will be beneficial during the rope
climbing to the summit.
The Climb
It’s the journey to the top that matters
Kinabalu Park SSL
We stayed one night before the climb at Kinabalu Park for altitude acclimatization and also for convenience. The accommodation package in Sutera Sanctuary Lodges offered a morning breakfast set too.
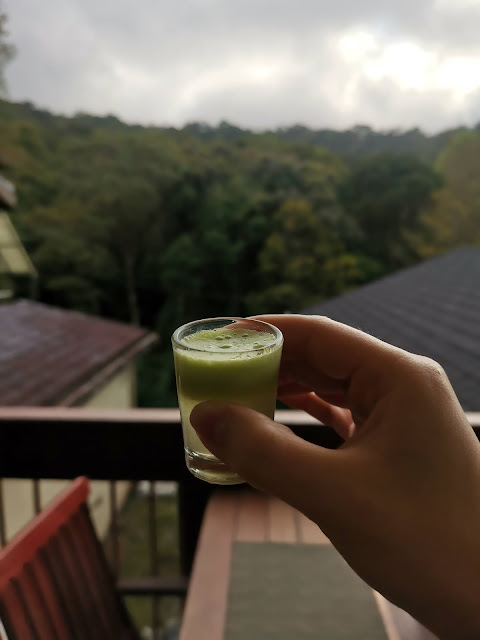 |
| energy booster shot before our climb |

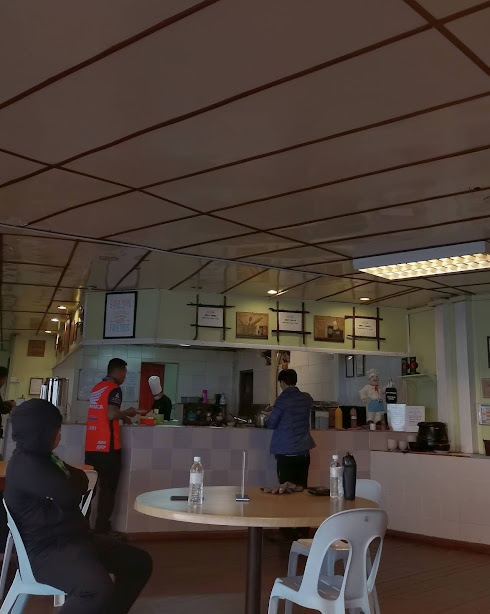
Registration
The registration process was not exactly a smooth one. There were many large groups of climbers who registered together which lengthens the process.

In addition to the long wait, there was no clear guide
from the staffs on how to go about the whole registration flow. As we were
booked through Sutera Sanctuary, we were required to register at two places-
Sutera Sanctuary booth and Sabah Parks office.
 |
| at least we had a view of Akinabalu during our long wait. |
After registration with Sutera Sanctuary to confirm our attendance for the accommodation, we received a packed lunch.
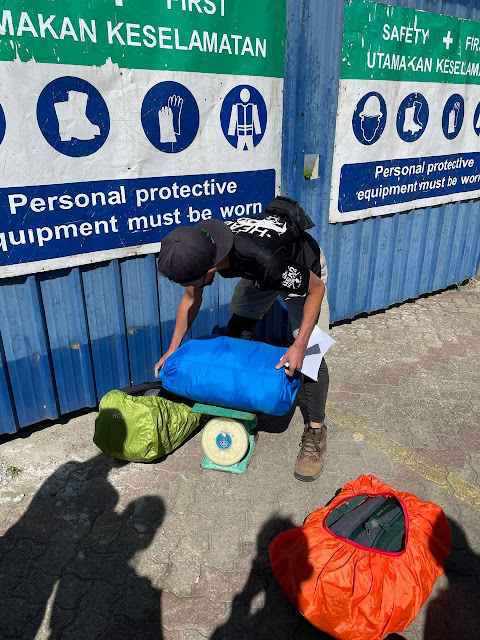 |
| weighing our bags for porter services |
Then, we proceed to the Sabah Parks registration booth to fill up some forms and made payment for the permit, insurance, guide, transport, and porter at the admin office. We were given the ID tags to be worn at all times. The entire registration process took more than one hour which delayed our hike a little.
Day 1: Timpohon Gate- Panalaban Base Camp
Before we commence, our mountain guide briefed us about the general overview of the trail and journey to Panalaban.
There are rest huts located along the route at every 1KM. They are equipped with toilets, untreated water supply, and seating area for climbers to catch a breath.
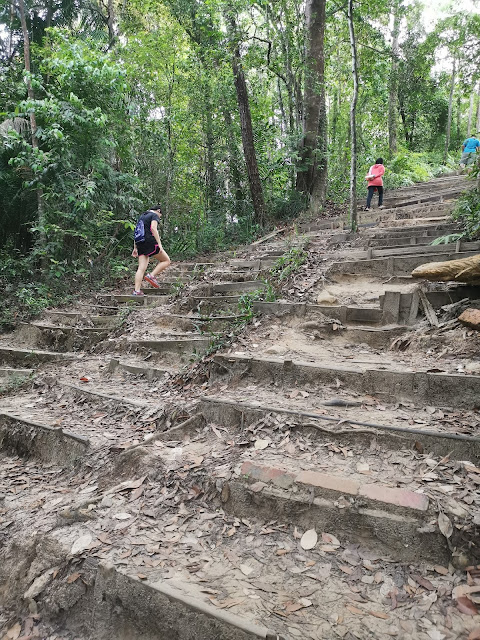
The journey for the first few KM was like walking up a never-ending flight of staircase. We stopped by at a few photogenic sites to take some photos as well as admiring the lush greenery of the tropics. We also stumbled upon the pitcher plant which is indigenous to Borneo.
Squirrels came to greet us at every rest point, eyeing our food perhaps. It’s advisable not to rest longer than 5 minutes to prevent body from cooling down, thus harder to regain momentum.
.jpg)
April was supposed to be the dry month, thus the best month to climb. But the weather was unpredictable and luck was not on our side.
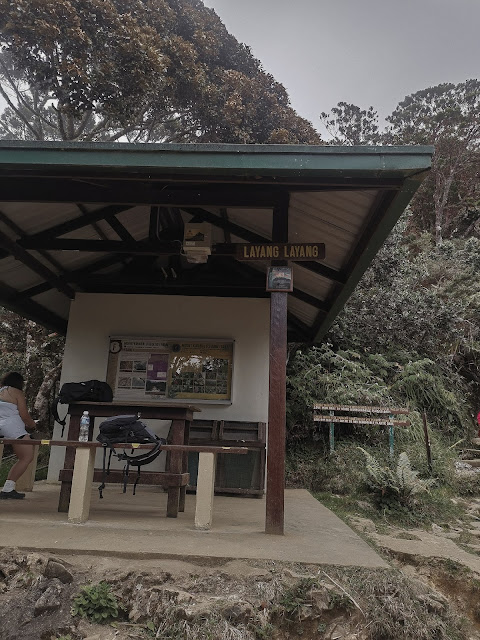
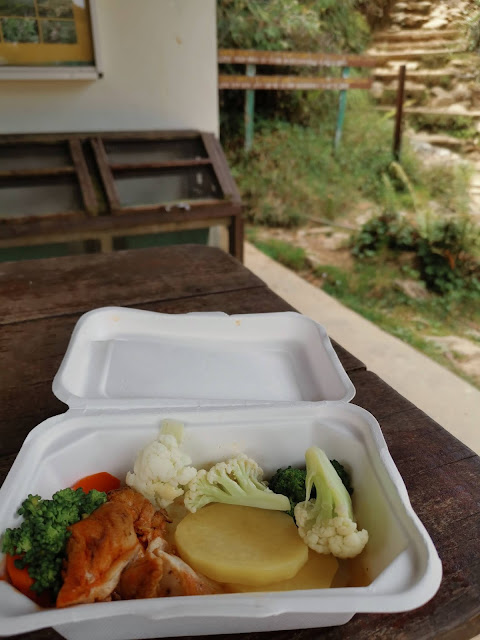
After we had our packed lunch at Layang-Layang Shelter at KM5, it began to rain.


We had our dinner after freshening up. Dinner time at
Laban Rata was from 16 30 hrs to 19 30 hrs. The buffet style dinner exceeded my
expectations. The array of food choices ranged from roast chicken to lamb,
western and Asian options, and even vegetarian option upon request.
Day 2: Panalaban to Summit
After gearing up with layers of winter wear, gloves, and headlamp, we continued our journey to the summit at 2am. It’s better to start early in order to meet the ‘’cut-off time’’ at Sayat-Sayat Checkpoint at 4.30am-5am and at KM8 at 7am.
The route to the summit was the most challenging. Apart
from battling with the cold and chilly subzero temperature, I remembered
struggling to climb the rocky mountain surface with the fixed hanging rope
while struggling to breathe the thin air at high altitude.
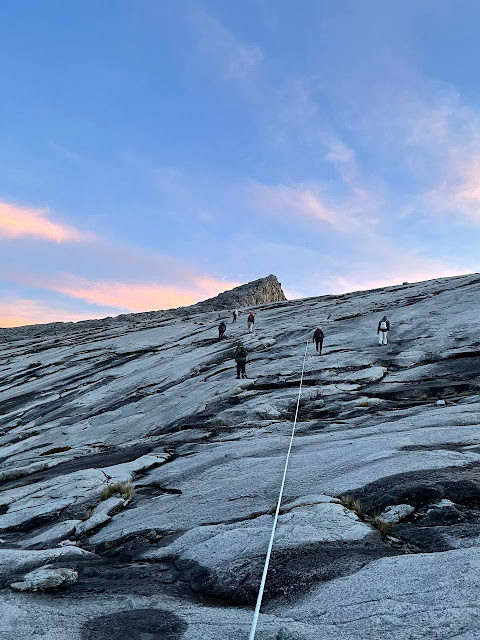
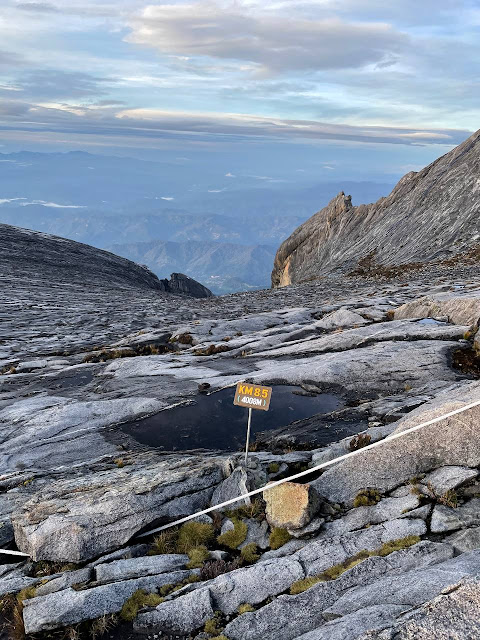
It was steep and rocky along the trail to the summit. Nevertheless, it felt great to see the stars shining in the sky amid the pitch darkness of night. Whenever I looked up to the sky, it kind of gave me hope I need to keep going.

When I finally reached Low’s Peak, it gave me the most rewarding feeling of self-achievement and a great deal of satisfaction, lauding my own efforts.

Descent
After soaking all in the incredible feeling of being
on top of the world, we began our descent to Panalaban. The sun had risen; hence
the weather became really hot and sunny. UV rays were pretty strong up there,
considering we were nearer to the sun. Be sure to apply UV protection and wear
sunglasses. We reached Panalaban base camp and had our breakfast.
The descent was harder than expected. It started to
rain from the moment we began our journey. The perpetual rain continued to
plague us all the way to Timpohon gate. It was even more daunting and dangerous
descending in the rain while carefully tread on the steep and slippery rocks.
Walking sideways and zig-zag pattern with the aid of the walking stick really
helped.
Drenched with
sweat and rainwater, it was the longest and most uncomfortable hike I ever had.
Throughout the hike, all I could think of was getting into a nice warm bubble
bath while sipping iced lemon tea after this ordeal.
The Aftermath
Treat yourself your favourite meal to replace those
lost calories because you deserve it! Hydrate sufficiently with electrolytes
and do some stretching or cooling down exercises. I soaked my feet with a
bucket of ice water too. And got plenty of rest.
PRO TIPS:
(Coming from my personal experience)
- Bring extra socks (more than 2 pairs). You may need a change of socks especially after drenched with rain. In fact, it comes into handy in protecting your feet from the cold at night.
- Bring 2 packs of disposable rain poncho. I had to reuse mine during the descent because I did not expect it would rain again on the next day as it was supposed to be a ‘dry’ month. Weather is very unpredictable up there, so be prepared.
- Invest in a good pair of hiking shoes with water resistant properties. My Columbia trail shoes were not very suitable for climbing the rocky path at the summit trail. Not to mention that my shoes were literally collecting rainwater. Good news was there was a shoe drying service at Panalaban Resthouse! Not sure it is available all the time, but the service was great and very useful. Our shoes were dried before the summit attack.
- Laban Rata no longer provides clean boiled water. You may bring your own drinking water or buy at Laban Rata. The price of getting a porter to carry 1 litre of water is same as the price of 1 litre water bottle at Laban Rata. But, there might be possibility the water bottles are sold out.
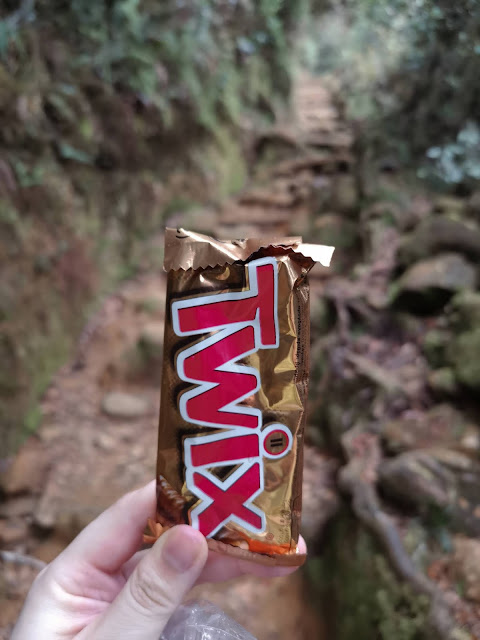
- You may pack enough energy bars but TBH, I only had one chocolate bar. I was feeling thirsty more than hungry.
- Trim your toe nails to prevent nail bruise as a result of nail bumping to the shoes. I trimmed mine but one of my toenails was still bruised. I guess trimming will just reduced the risk of nail bruising.
- It's better if you take medications as prophylaxis for Acute Mountain Sickness (AMS). Dexamethasone works for me and I never experienced any symptoms of AMS. Consult your pharmacist to get the right medications and correct dosage!
HELPFUL LINKS:
Here are some helpful links which helped me a lot
during my planning and training:
| together with our awesome mountain guide! |
It was a victorious feat to climb the highest mountain
in Malaysia and an unforgettable experience. Will I climb again? Well…. maybe for Via
Ferrata.

Comments
Post a Comment